CODE TRIP
CODING A SQUARE
Students will discover many different ways to draw a square using block based coding in Scratch.
Intentionality
Spark Curiosity
Fuel Sensemaking
During Moves
Student Approaches
Next Moves
Consolidation
Reflect and Consolidation Prompts
Resources & Downloads
Educator Discussion Area
Intentionality & Unit Overview
Length of Unit: 5 Days
Access each lesson from this unit using the navigation links below
In this task, students will be asked to use the Pen tool in Scratch to draw a square. Once they have figured out how to draw it one way, they will try to find different coding blocks that produce the same square. The task will encourage students to use creativity and problem solving to discover a variety of coding blocks that can produce similar results.
The intention of today’s task is for students to make a connection between the problem that they are trying to solve (drawing a square) and finding the most appropriate, efficient way to solve it. Through the consolidation, students will see all of the different ways that their classmates found to draw the square, and will determine the most efficient use of code, from all the possibilities. Some of the big ideas revealed through this task include:
- Coding is a creative activity based on problem solving;
- When coding, problems need to be broken down into smaller steps;
- There are many different ways to solve each step of a problem, but some are better suited and more efficient than others;
- Using Repeat Loops reduces work time and increases efficiency.
Detailed Walk Through of All 5 Days
Intro to Scratch Walk Through
Drawing a Square Walk Through
Spark Curiosity
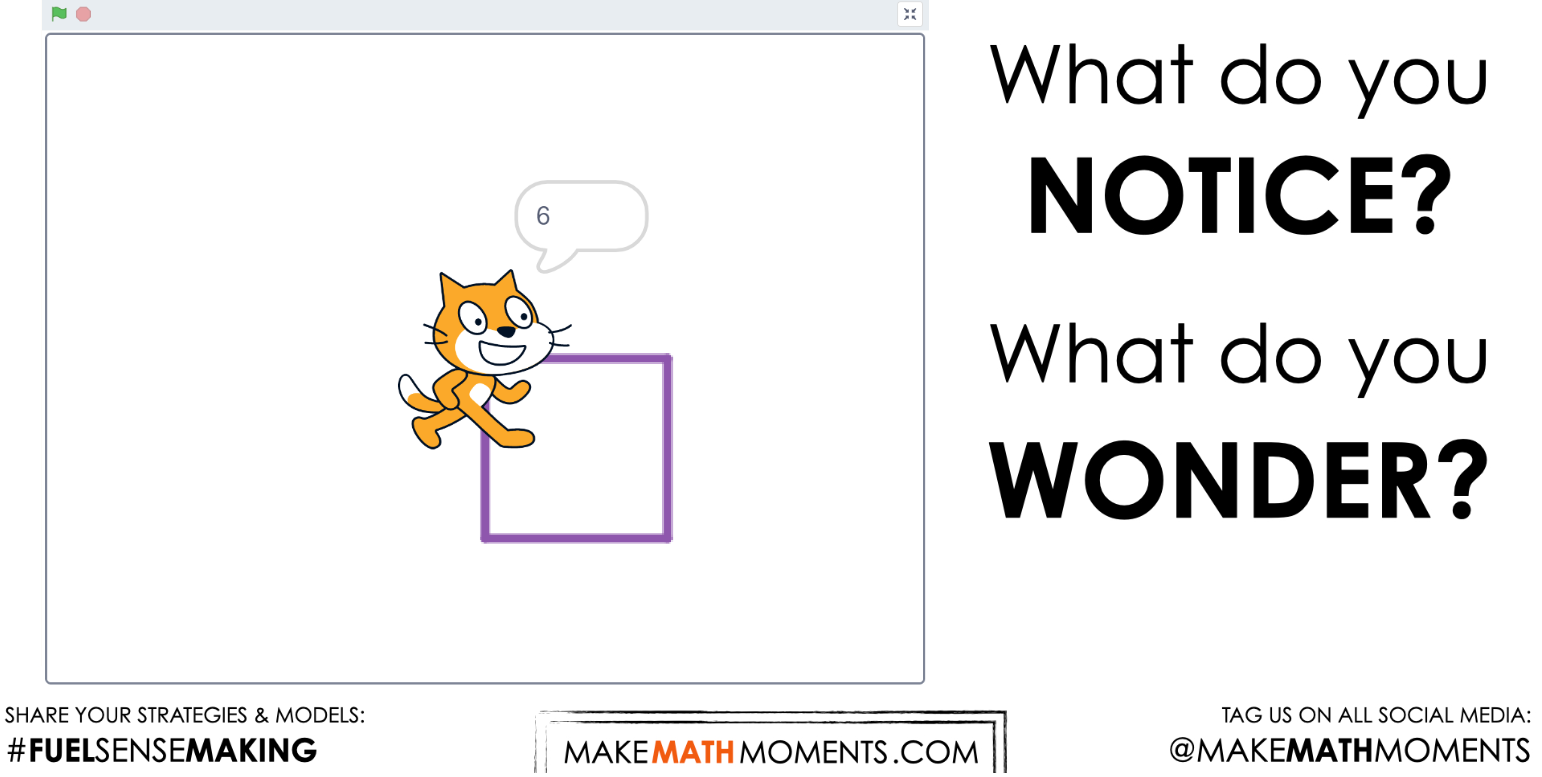
What Do You Notice? What Do You Wonder?
Show students this “Different Ways to Draw a Square” project
Click on the green flag and watch the cat carefully.
Then, ask students:
What do you notice?
What do you wonder?
Give students 60 seconds (or more) to do a rapid write on a piece of paper.
Then, ask students to share with their neighbours for another 60 seconds.
Finally, allow students to share with the entire group.
Some of the noticing and wondering that came up in a class recently included:
- I notice the cat faces different directions in the different examples.
- I notice the cat doesn’t move in the last example.
- I wonder if the “hide” block is being used.
- I wonder how the cat is drawing a line.
At this point, you can answer any notices and wonders that you can cross off the list right away.
For example:
- This is all one long script of code.
- Each time the cat draws a square, different coding blocks are being used.
- You will be shown how to draw a line in Scratch
Estimation: Prompt
Next, ask the following question:
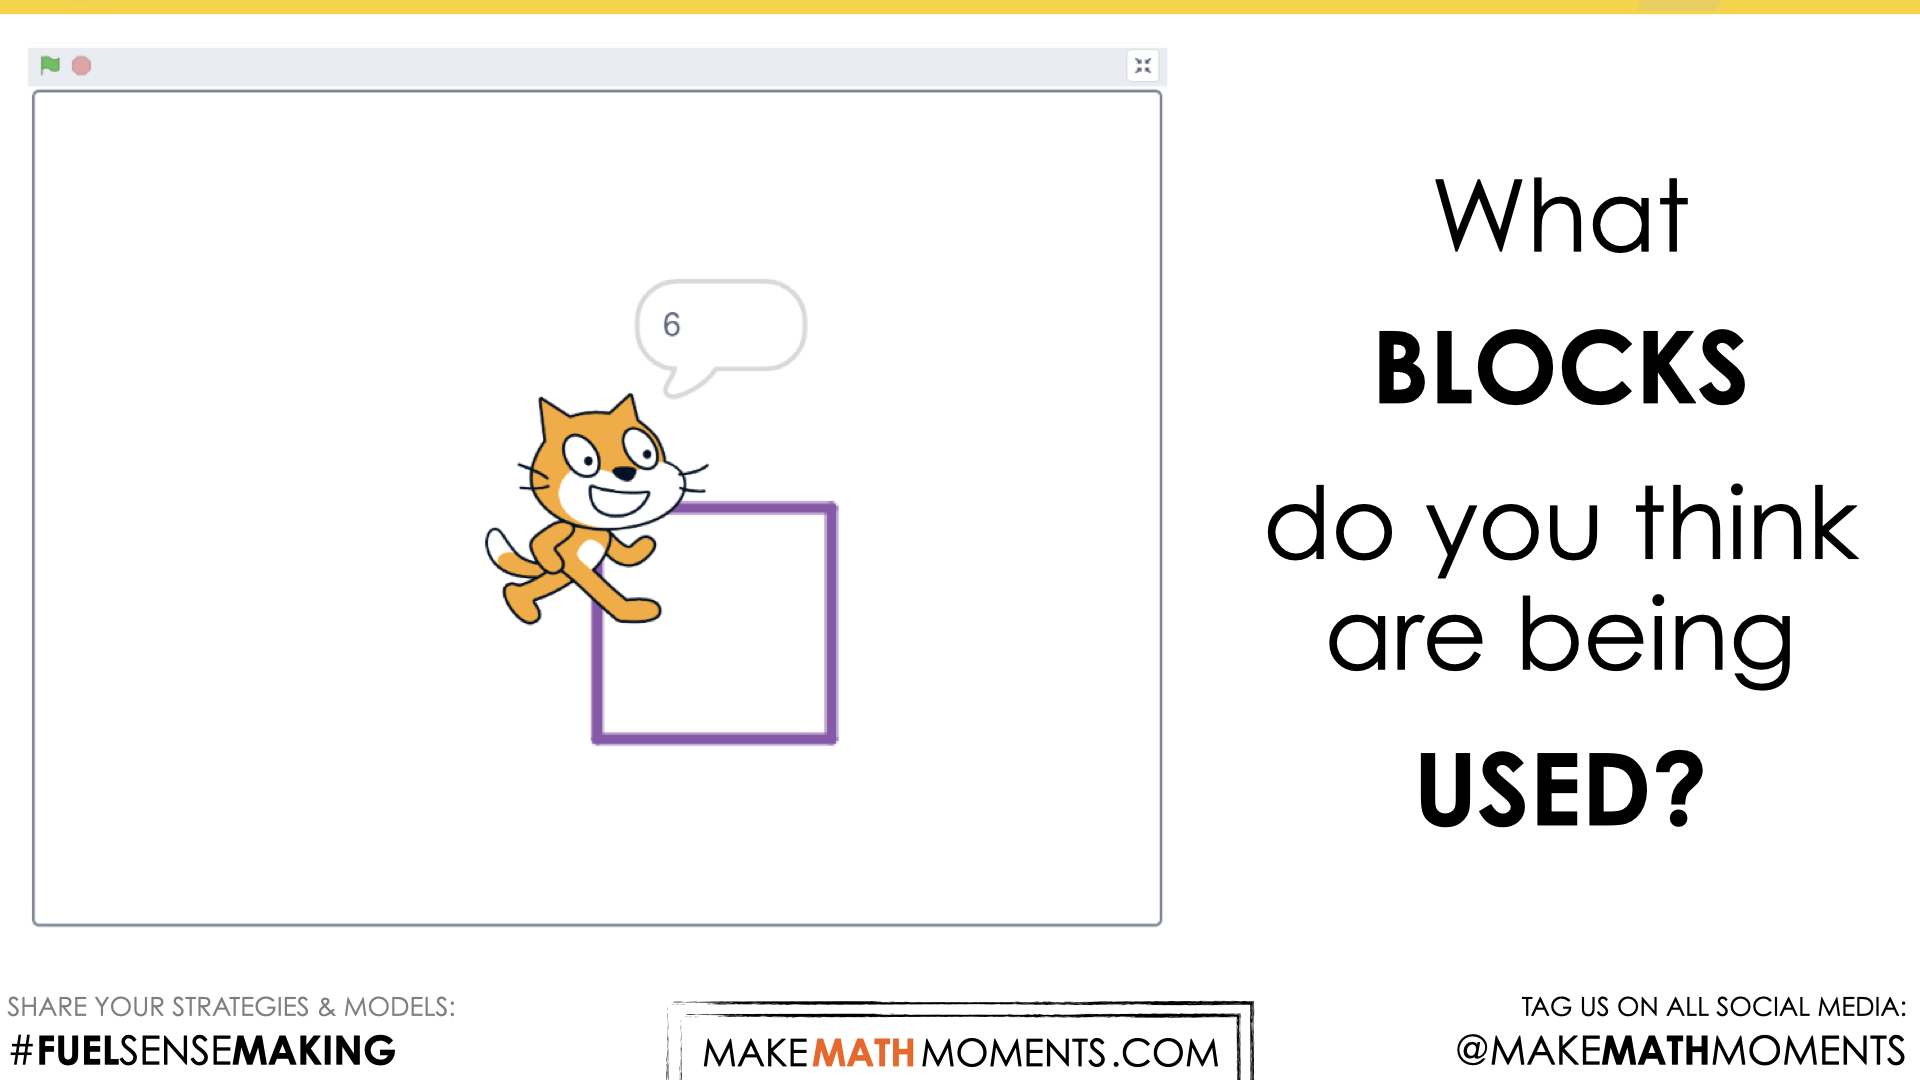
What blocks do you think are being used?
We can now ask students to make an estimate (not a guess) as we want them to be as strategic as they can possibly be. This will force them to use reasoning to try and come up with reasonable choices.
While Students Are Estimating…
Allow students to look through the coding blocks available to them (on the left hand side of Scratch) and write down which blocks might be useful. If you do this as a whole class, as students share their estimates, consider writing down the reasonable ones, so they have options to start with.
Fuel Sense-making
Crafting A Productive Struggle: Prompt
Since you have already sparked their curiosity, we have them in a perfect spot to help push their thinking further and fuel sense making.
As an option, you can use the following “Drawing Squares Different Ways Example”project to show a different way to code the squares, where you add a new Sprite for each different variation of code, instead of having one long script.
Click each sprite to see 6 different ways to code a square. Which blocks do you think are used for each of the different ways?
How can you use these blocks to help you code a square?
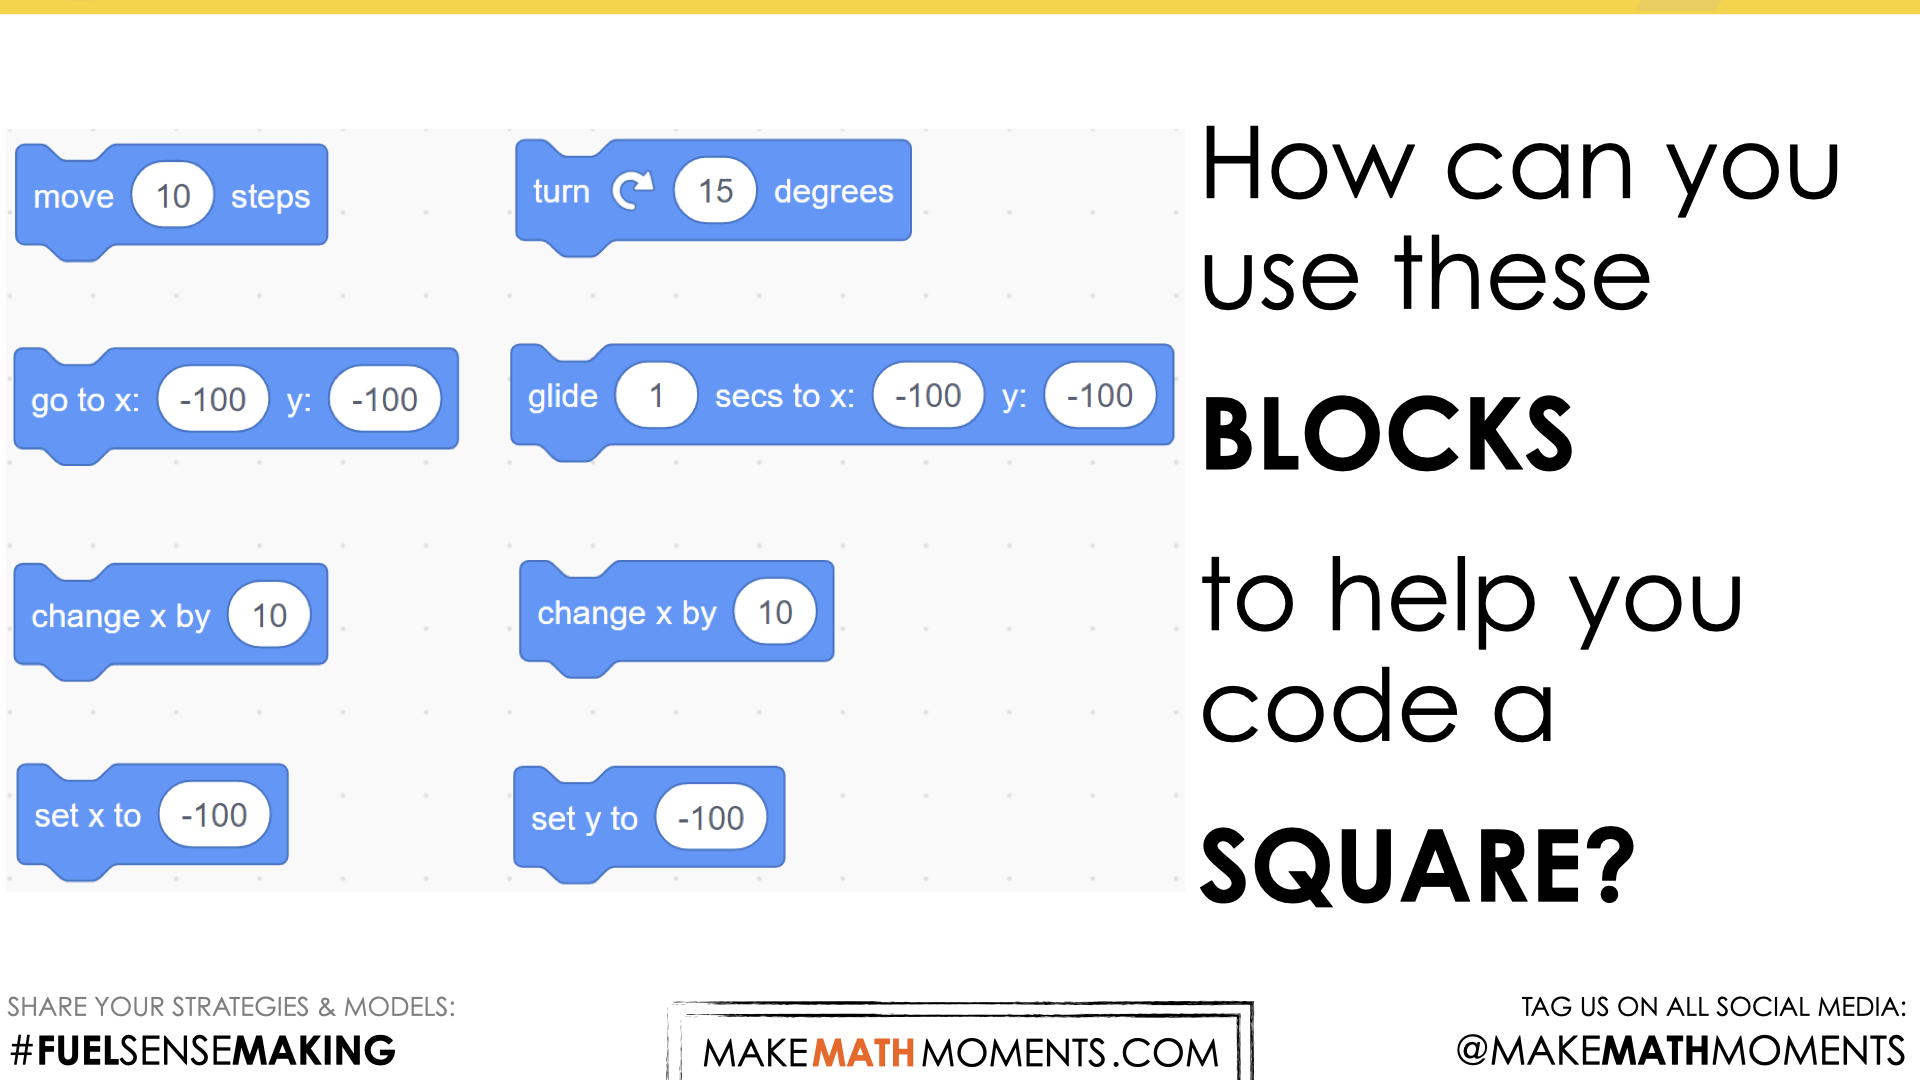
You will now give students the challenge of coding a square in as many different ways as possible. Be sure to make clear the fact that the square needs to be exactly the same size, colour and position, but the blocks that are used to code it will be different. Explain that you have found 6 ways, but that you are hoping they will find even more. You can see the 6 more clearly if you open the “Broadcast Different Ways to Draw a Square” project and “See Inside”. Depending on student level of comfort with Scratch, you may want to show them some potential blocks to use or a few different ways to draw a straight line, to get them started.
During Moves
While Students Are Productively Struggling…
Monitor student thinking by circulating around the room and observing student problem solving. A common misunderstanding is that students draw DIFFERENT SQUARES, instead of the same square, but with DIFFERENT CODE, like in the examples.
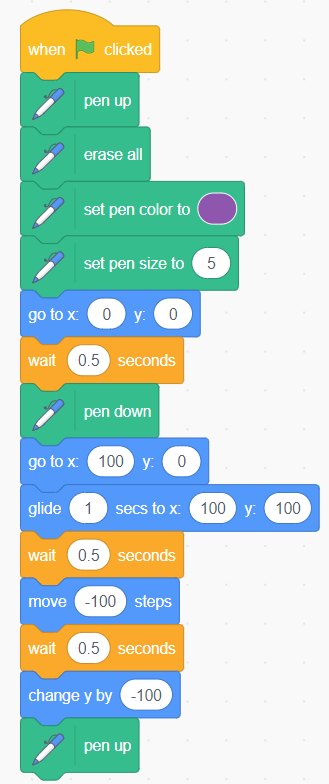
To get students started, you can show them some blocks that they will need to use:
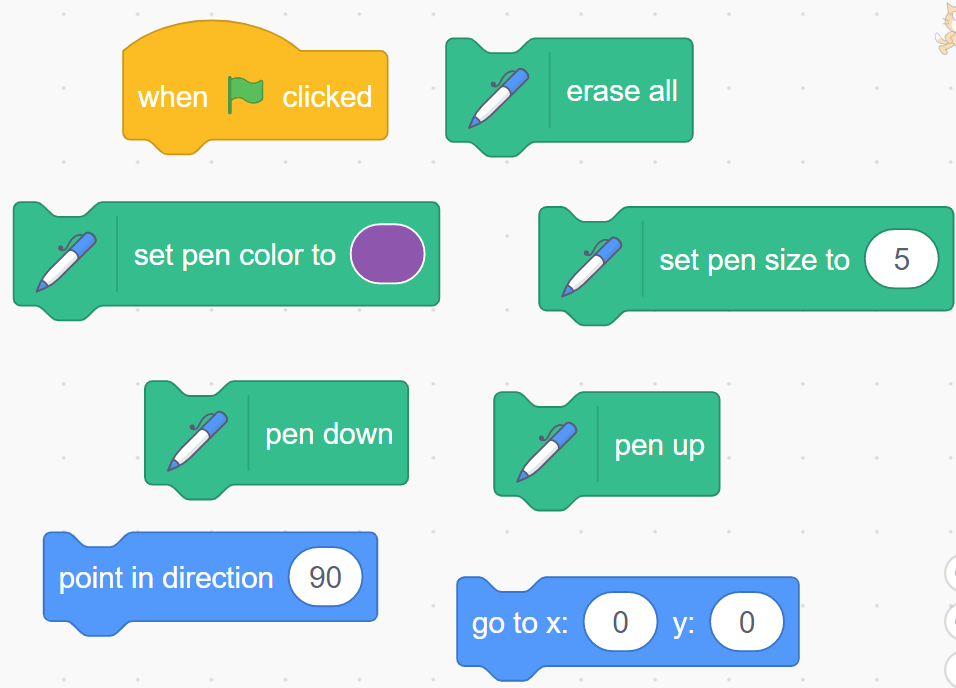
Have students “Share” their project to the class Studio so that everyone can see each other’s projects. From the Studio, select and sequence some of the student solutions, show them to the class, and ask a student from the selected groups to share with the class from:
- most accessible to least accessible solution strategies and representations;
- most common misconceptions;
- most common/frequent to least common/frequent representations; or,
- choose another approach to selecting and sequencing student work.
The strategies you might see students use include:
- Randomly choosing blocks
- Systematically moving through the blocks in the Motion section;
- Using increasing efficiency, such as Repeat blocks, etc.
Have students share their reasoning for why they chose different blocks.
Discuss their thinking during your consolidation to build off of their current prior knowledge and understanding rather than “fixing” or “funnelling” student thinking to a representation and justification that does not connect to their understanding.
Student Approaches
Student Approach #1: Creating Different Squares with the Same Code
Some students do not understand that you can use DIFFERENT code to create the SAME square, so they use the SAME code to create DIFFERENT squares. Giving them examples of different blocks they can use will help get them started. For example: MOVE, TURN, CHANGE X BY, CHANGE Y BY, GO TO X:__ Y:__, GLIDE TO X: __ Y:__, etc.)
Student Approach #2: Moving without Moving
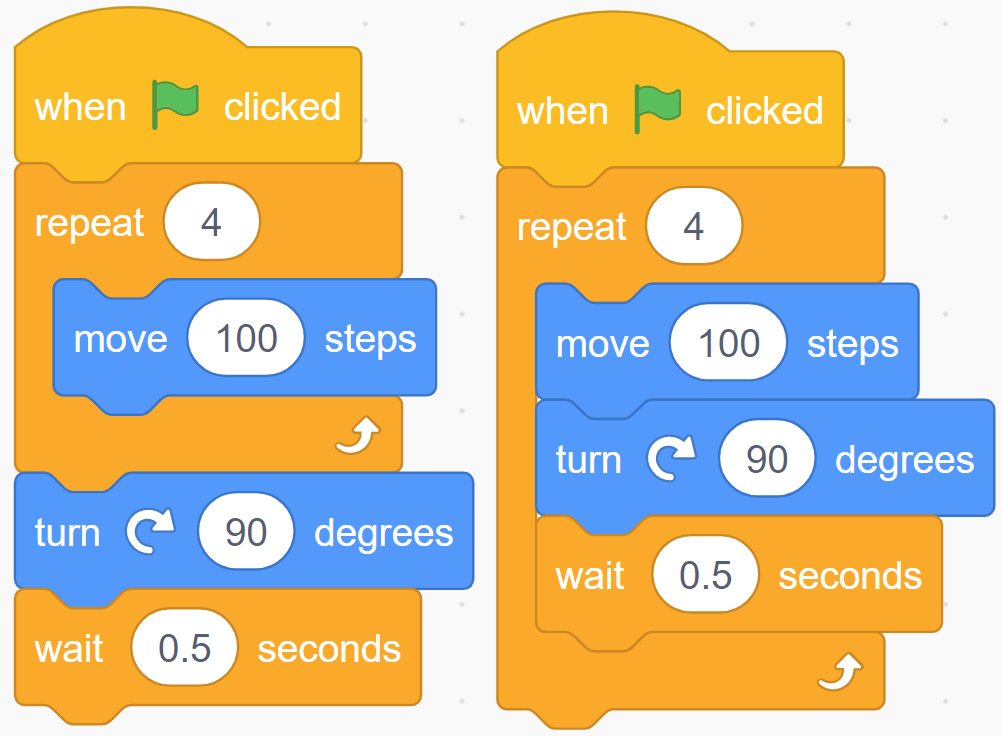
Because things happen so quickly in coding, sometimes we can’t see the action because it was too fast. The code on the right has the sprite move in a square, but it won’t look like it’s moving because it travels too fast. Adding WAIT blocks helps us see what the sprite is actually doing.
Student Approach #3: Repeat Blocks
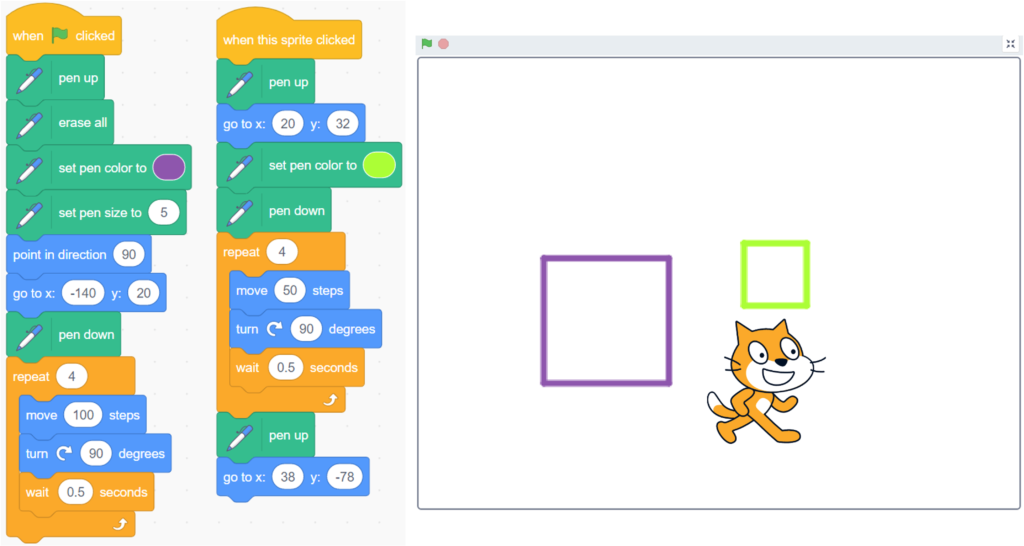
All of the actions that you want repeated need to be INSIDE the repeat block, as the code in the repeat block will be repeated the specified number of times, and then the code outside of the block will run. The code on the left will not work. The code on the right will.
Next Moves
Reveal
Open the “Broadcast Different Ways to Draw a Square” project and “See Inside” to show students the 6 different variations. Ask students, “Did you find any solutions that were similar to this example? Did you find any that were different?”
Project Reveal:
Click each number to see 6 different ways to code a square.
Here are 6 different ways you could code a square. Which of these did you find? Did you find any other ones?
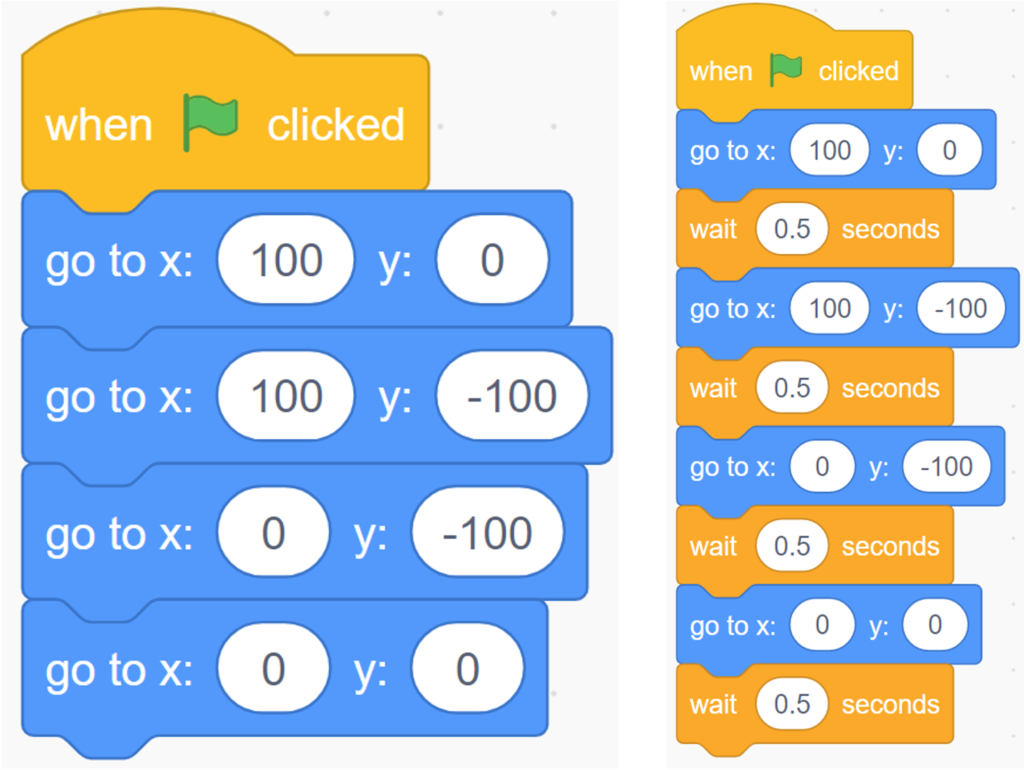
Consider sharing the following screenshots with students:
Image #1 is the full coding script that students would ideally have created.
Image #2 is the script broken up into each of the 6 strategies in the demonstration project.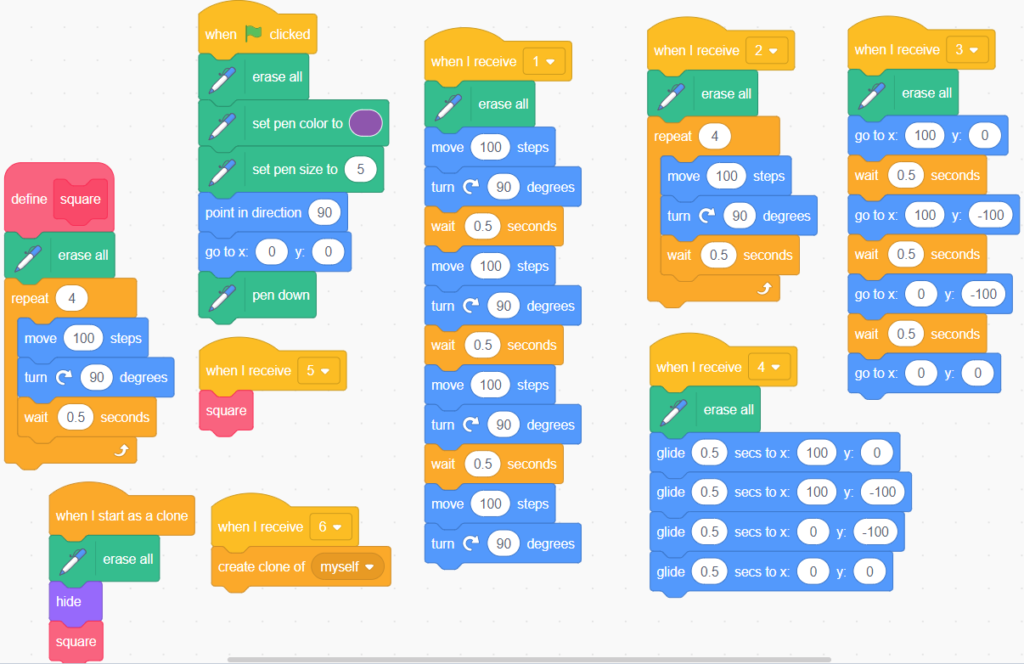
Discuss which methods use code in the most efficient way. If they had to code a square to be drawn thousands of times in a project, which code would take up the least amount of memory? Which would they most like to use? Return to the estimates from the beginning of today’s lesson. Celebrate all the estimates closest to the actual variations that were used, and highlight the efficient use of code found in the one using the Repeat loop.
Drawing a Square Extension Walk Through
Drawing a Square with Sprites and Broadcasting Walk Through
Consolidation
Leverage student examples as an opportunity to explore each of the following big ideas:
- Sequencing: blocks need to be put in a specific, order, taking into account things like starting point, setting colours, erasing previous work, etc;
- Efficiency: using Repeat loops Nested Events result in fewer code needing to be written;
- Creativity in problem solving: there are many ways the same problem can be solved, but some are more efficient or appropriate than others.
Reflect and Consolidation Prompts
Provide students an opportunity to reflect on their learning by offering these consolidation prompts to be completed independently.
Consolidation Prompt #1:
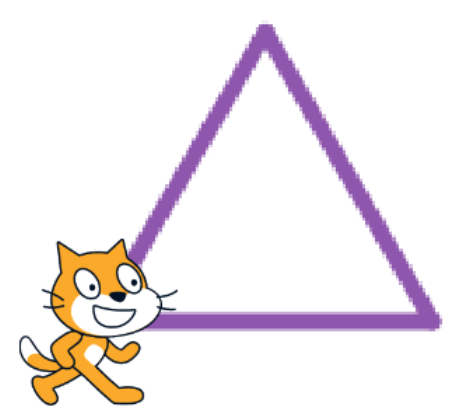
How could you use a Repeat Loop to code a triangle?
Consolidation Prompt #2:
How could you use a Repeat Loop to code a rectangle, when the length and the width are not the same?
We suggest collecting this reflection as an additional opportunity to engage in the formative assessment process to inform next steps for individual students as well as how the whole class will proceed.
Resources & Downloads
Printable Lesson Plan PDF
Videos, Images & Media Files
Apple Keynote Presentation
Powerpoint Presentation
Printable Consolidation Prompts
Educator Discussion Area
Login/Join to access the entire Teacher Guide, downloadable slide decks and printable handouts for this lesson and all problem based units.
Explore Our 60+ Problem Based Units
This Make Math Moments Lesson was designed to spark curiosity for a multi-day unit of study with built in purposeful practice, number talks and extensions to elicit and emerge strategies and mathematical models.
Dig into our other units of study and view by concept continuum, grade or topic!
